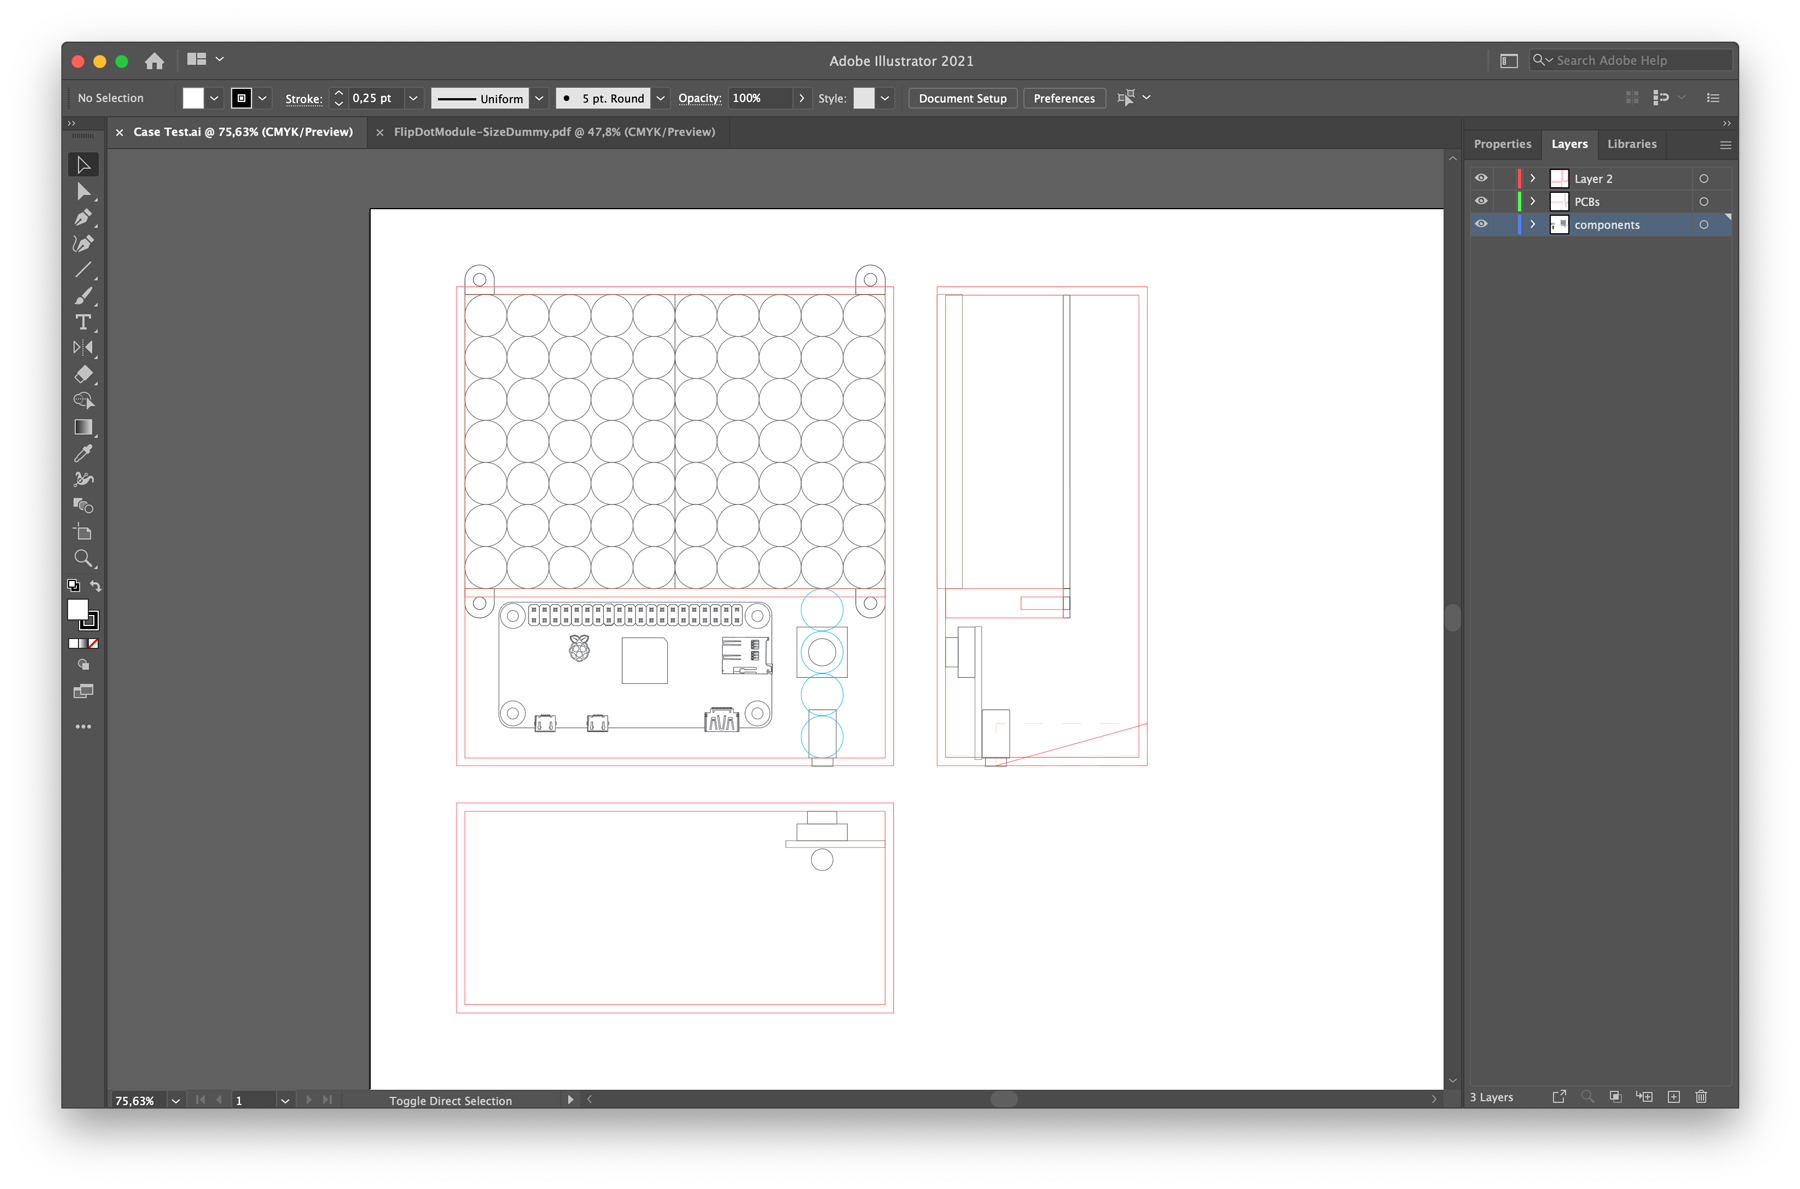
To get the case done, I started to design the base components in Illustrator. Here I got the first ideas for positions and sizes.
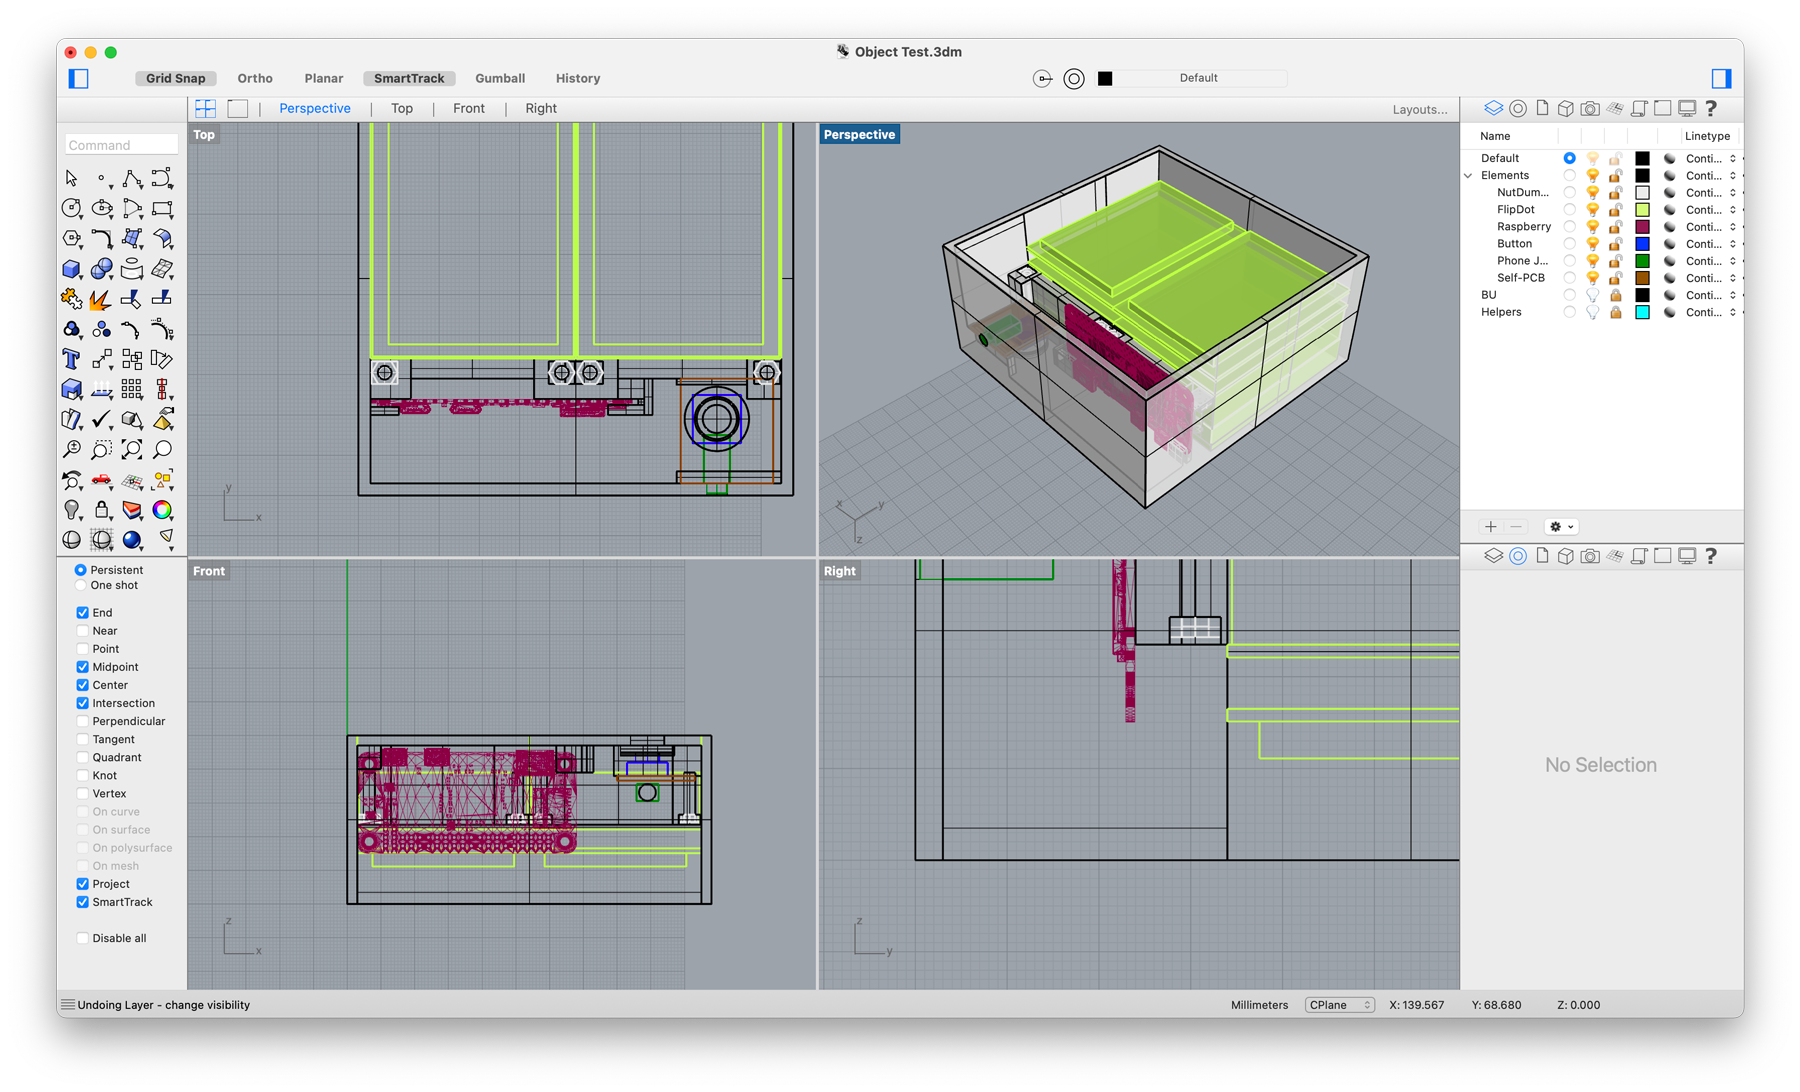
After realizing that I cannot place the components good in a 3D environment, I switched to Rhinoceros 3D to create the first model of the case.
This one then got printed at my old office (thank you Andreas!).
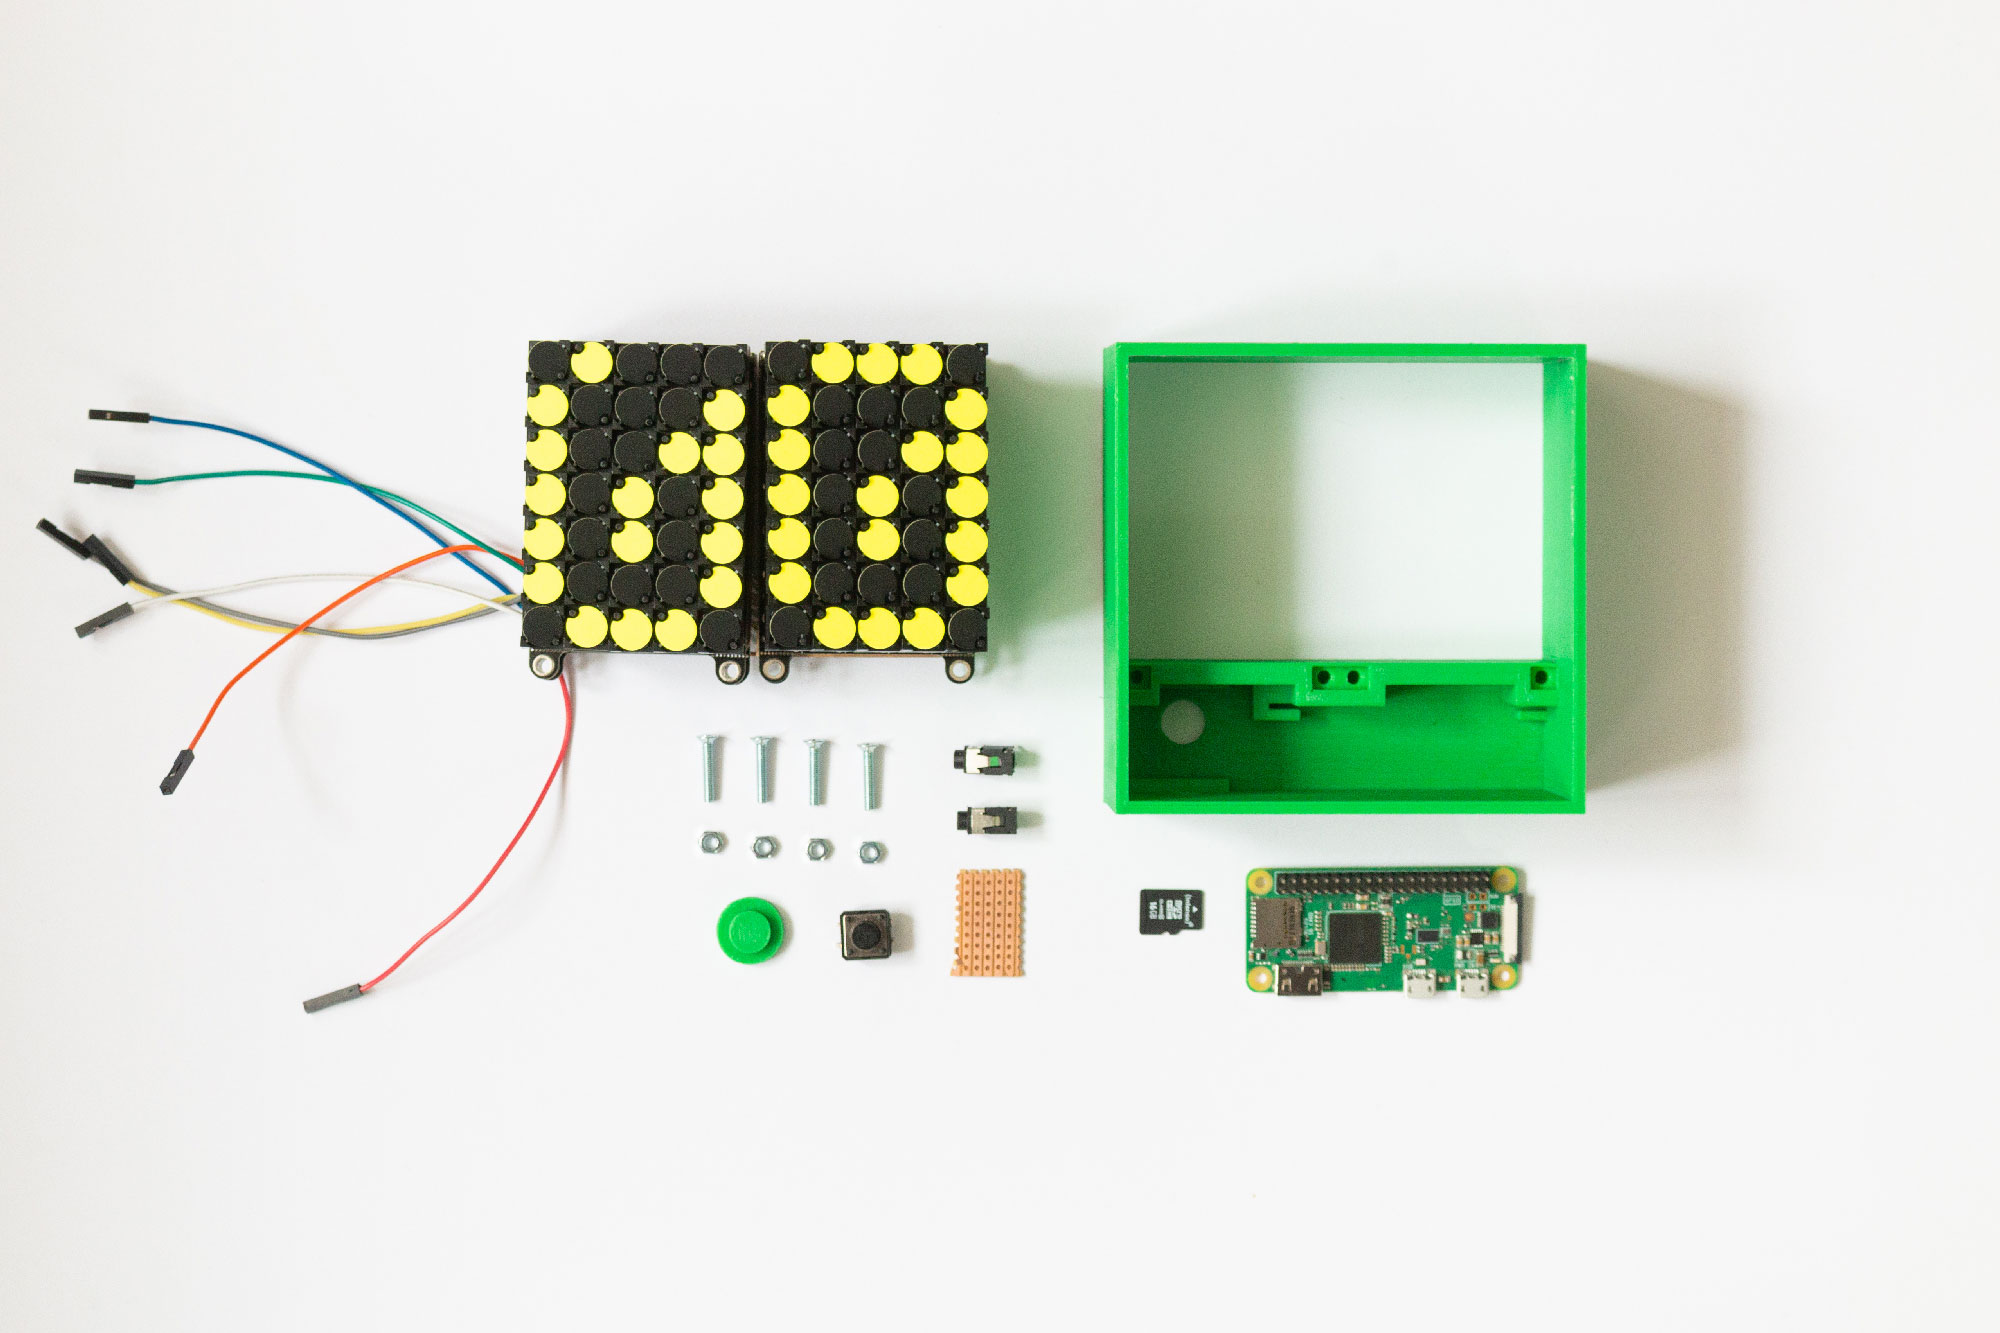
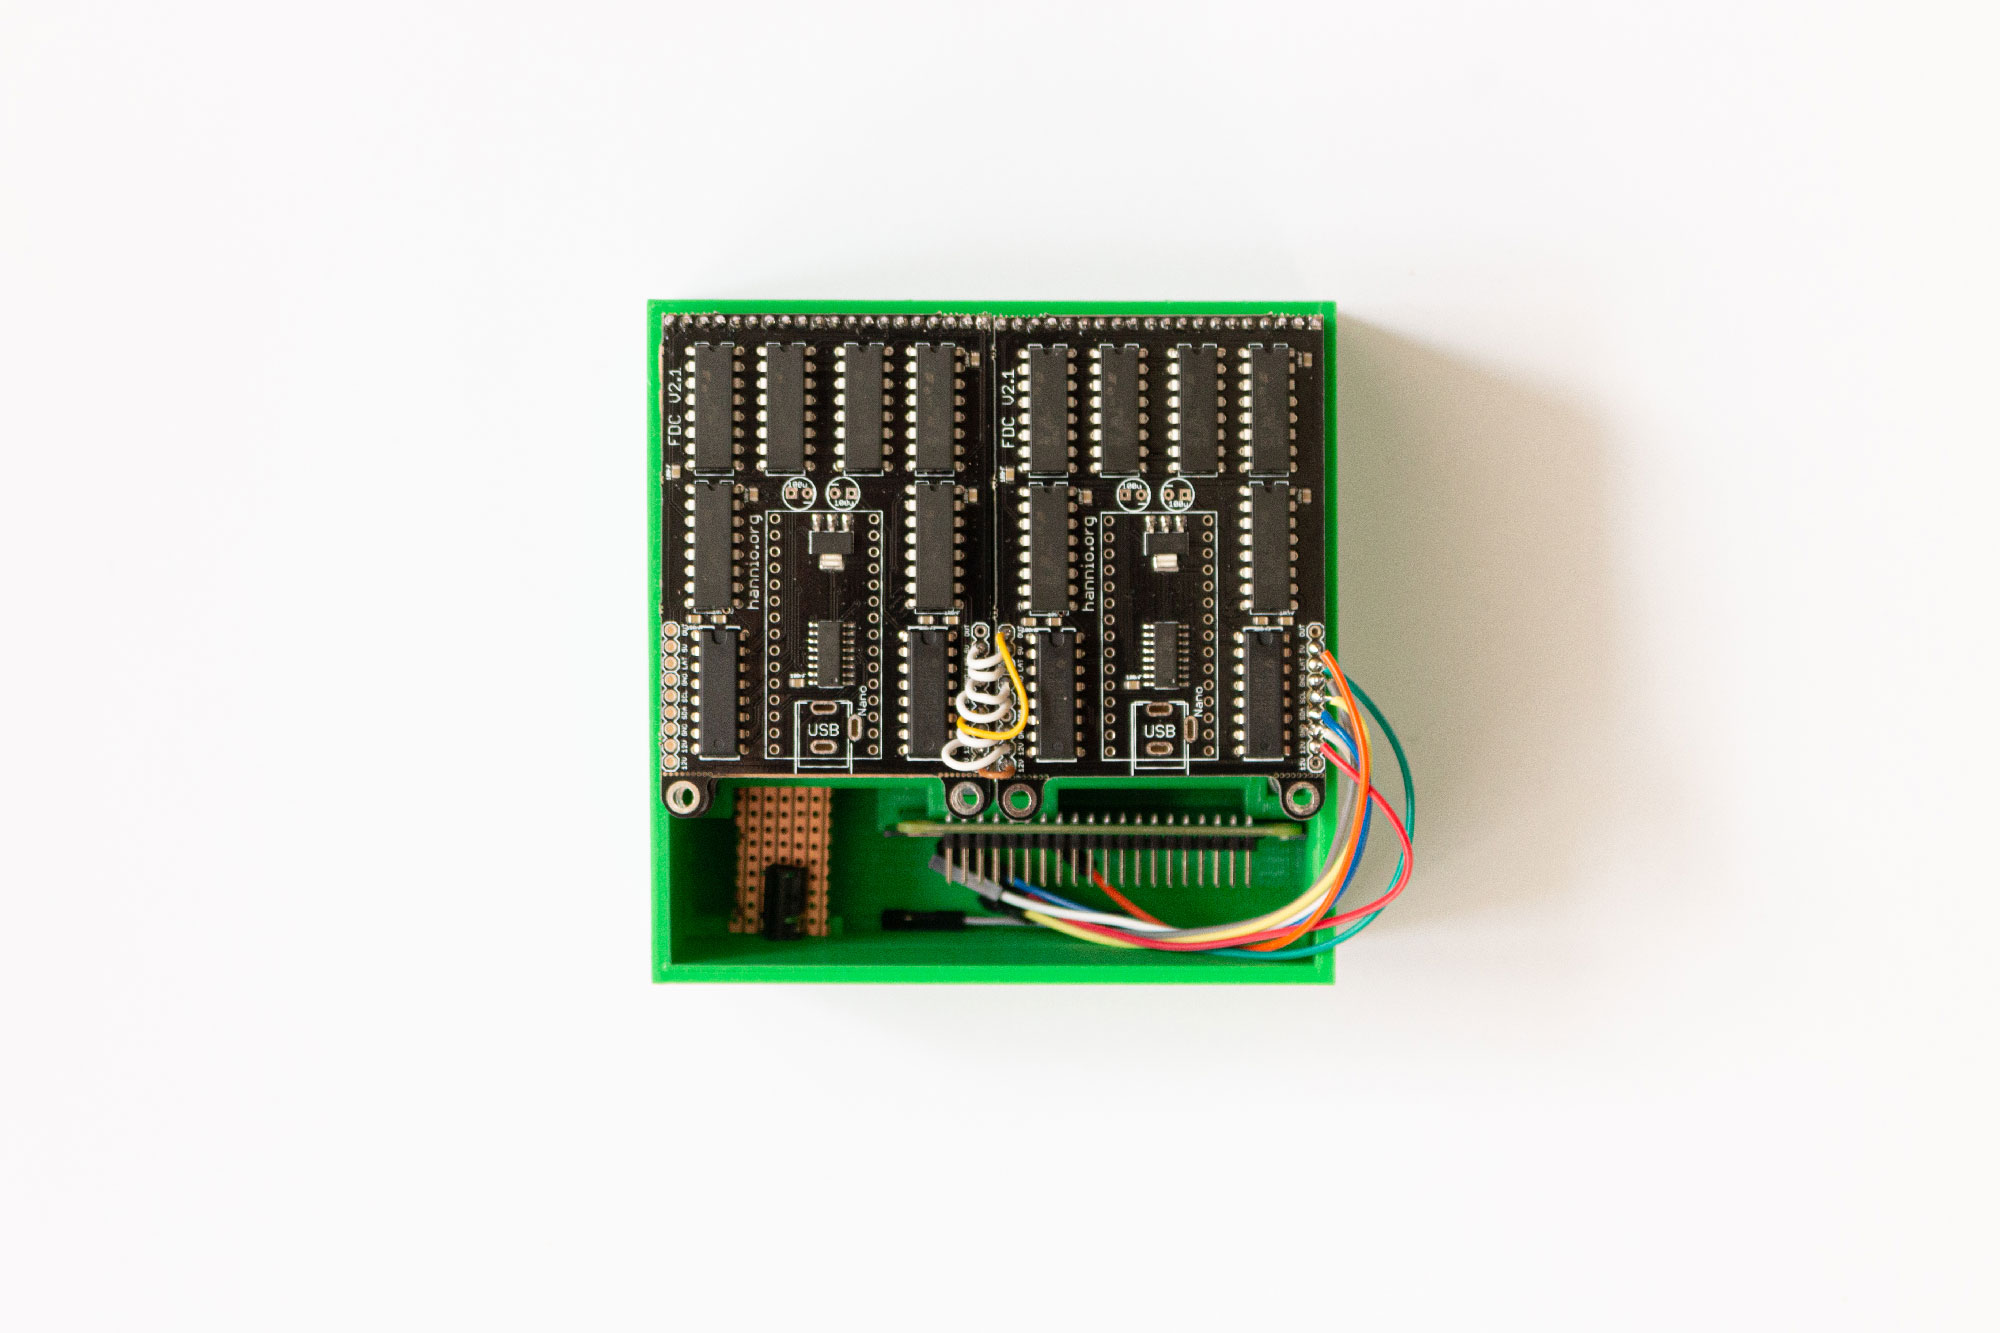
Trying to assemble the components I could already see which elements work and which do not. E.g. the flip dots need a tiny bit more tolerance to get into their “window”. Also the PCB for the button fits quite well but does not leave connection room for the phone jack, hence I need to add multiple strip boards at this location to not let them interfere with each other.
Other parts worked surprisingly well! The Raspberry Pi Zero fits perfectly into its compartment, which I did not expect to fit from the first try on. Also the button is satisfyingly press-able with the position of the strip board.
With these new insights, I want to refine the CAD model to print a version in which all the components fit as imagined